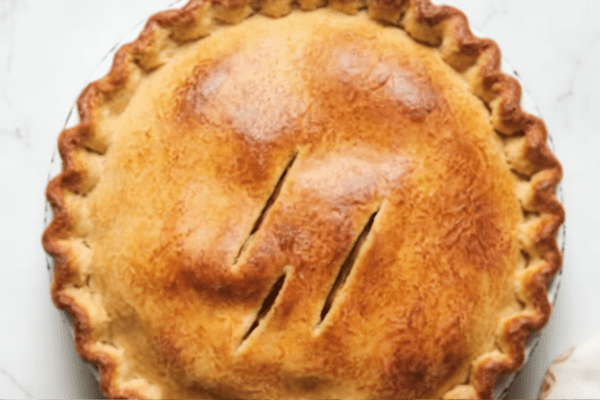
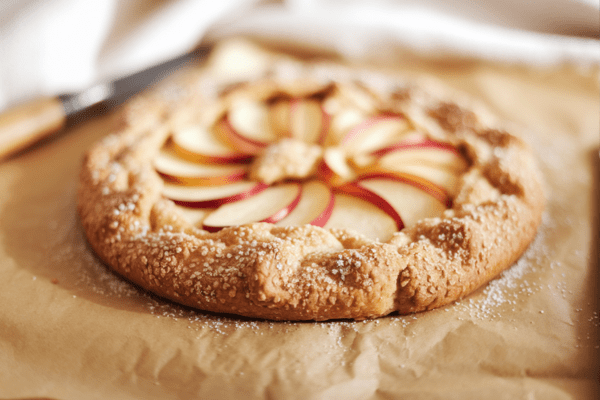
I’ve lost count of how many pie crusts I’ve baked over the years, but this gluten-free version has truly become a staple in my kitchen. It has that classic buttery taste and those tender, flaky layers that remind me of the pies my mother used to bake. I love that it’s easy enough for a weeknight galette but reliable for special occasions when you want everything just right.

If you’ve ever felt intimidated by gluten-free dough, don’t worry—I’ve been there, and I promise this method will help you get that perfect crust without the stress. Let’s talk about what makes it work so well.
Choosing the Right Gluten-Free Flour: What Works Best for Me
I spent a good chunk of time testing different gluten-free flours before settling on my favorite. Some blends were dry and fell apart like damp sand, while others left an odd aftertaste. I finally landed on a store-bought blend that just worked every single time.
I personally use Cup 4 Cup because it behaves so much like regular flour. When I roll it out, it holds together beautifully and doesn’t crack at every turn. It’s not the only blend you can use, but in my experience, it’s the one that saves my sanity on busy baking days.
If you like to mix your own blend at home, you can definitely do that too. Just keep in mind you want a balanced mix that offers both structure and tenderness.
What You’ll Need for This Pie Crust
The ingredient list is short and familiar, which I love because it makes it approachable even if you’re not a frequent baker.
- Gluten-free flour blend (I usually go with Cup 4 Cup, but any good blend will do)
- Fine sea salt (for balanced flavor)
- A bit of sugar (I love the subtle sweetness and extra browning it gives, but you can leave it out)
- Cold butter (I like European-style butters for their richness—they make a big difference)
- Apple cider vinegar (helps keep things tender and flaky)
- Ice water (for bringing it all together)
I find it reassuring that you don’t need anything fancy here—just good ingredients and a bit of patience with the chilling time.

How I Make This Gluten-Free Pie Dough at Home
I’m pretty practical about making pie dough—I use my food processor most days because it’s so quick, but I’ve made this plenty of times by hand on my old wooden countertop.
Here’s how I do it:
- Keep that butter cold. Seriously, this is non-negotiable. I cut it into small cubes and chill it while I measure everything else.
- Mix the dry ingredients. In the food processor, it’s just a few pulses to blend the flour, salt, and sugar.
- Add butter. Pulse until it looks crumbly but still has visible chunks of butter. That’s where the flakiness comes from.
- Add liquids. I drizzle in apple cider vinegar and then just enough ice water so it holds together when pinched. Don’t soak it—you want it just coming together, still a bit rough.
- Shape and chill. I divide it into two disks, wrap them up, and chill for at least half an hour. Sometimes I make these disks days in advance so they’re ready to roll.
When I’m doing this by hand, I use my fingers or a pastry cutter to rub the butter in. It’s a bit messier but honestly kind of meditative.
Making Pie Dough Ahead: My Favorite Kitchen Shortcut
I don’t always have time to bake pies the same day I make dough, so I nearly always make extra disks and stash them in the freezer. They’re good in the fridge for a couple of days, but in the freezer, they’re like little baking gifts to myself.
I can’t tell you how many times I’ve thanked past-me for thinking ahead—especially during the holidays. Pulling out ready-to-roll dough means dessert is halfway done before I even preheat the oven.
How I Use This Dough in Everyday Baking
I use this crust for almost everything. It works in sweet pies like apple, peach, or berry galettes, but it’s equally great for savory bakes like quiches or hand pies.
One of my personal go-to’s is a rustic galette filled with whatever fruit I have around. Peaches in summer, apples in the fall. I also use it for savory spinach and cheese galettes for brunch.
It makes enough for one double-crust 9-inch pie or two single-crust pies. Sometimes I’ll make hand pies for the kids with leftover scraps—they love them, and nothing goes to waste.
My Personal Tips for Success
Here’s what I’ve learned after many flour-dusted afternoons in my kitchen:
- Roll on parchment. A lightly floured sheet of parchment keeps things from sticking and makes transferring the crust easy.
- Egg wash. Brushing with a beaten egg gives you that glossy, golden finish. I sometimes sprinkle turbinado sugar over sweet pies for extra crunch.
- Watch your browning. A glass pie dish lets you see if the bottom’s done. If the top is getting too dark before it’s cooked through, I loosely cover it with foil.
- No food processor? No problem. Mix dry ingredients in a big bowl, rub in the butter by hand, and use a fork to gently blend in the liquids. It’s slower, but it works just fine.
Rolling dough used to be the scariest part for me. I’d get cracks, frustration, even tears. But over time, I learned to go slow, use enough flour on the parchment, and patch cracks with extra dough. No one notices once it’s baked.
Questions I Get About This Recipe
Which gluten-free flour works best?
I’ve tried quite a few, and Cup 4 Cup is my top choice because it gives that classic, tender texture without falling apart.
Can I make it dairy-free?
I’ve had readers swap in plant-based butter sticks with decent results. Just make sure they’re the firm kind, not soft tubs.
Does it really freeze well?
Absolutely. I wrap the disks tightly and label them with the date. They’re good for about three months. Thaw overnight in the fridge before using.
Do I need to blind-bake?
For certain fillings (like custards or quiches) I do blind-bake it first. For fruit pies, I often skip it unless I want an ultra-crisp bottom.

Let’s Bake Some Pie
If you’ve been avoiding homemade crust because you thought it was too finicky, I hope this gives you the nudge to try it. There’s nothing quite like the smell of butter and flour baking together in the oven, and this crust makes sure that gluten-free bakers don’t miss out on that.
So grab your favorite rolling pin, chill your butter, and let’s get baking. I promise it’s worth it.
Gluten-Free Pie Crust

This gluten-free pie crust is tender, buttery, and just as flaky as traditional dough.
Ingredients
- 2 sticks (8 ounces) unsalted, good-quality butter (preferably cultured or European style), cut into ½-inch dice
- 1 teaspoon apple cider vinegar
- 2 ½ cups (326g / 11.5oz) Cup4Cup brand gluten-free flour OR 2 ½ cups (319g / 11.25oz) all-purpose flour, plus more for workspace
- ½ teaspoon fine sea salt
- 1 tablespoon sugar (optional; omit for savory crusts)
- ⅓ - ½ cup cold water
Instructions
- In a food processor, combine the flour, sea salt, and sugar if using. Pulse once or twice to mix.
- Scatter the cold butter pieces over the flour mixture. Pulse several times until the mixture resembles coarse crumbs with visible pea-sized chunks of butter throughout.
- Drizzle in the apple cider vinegar. With the processor running, slowly pour in cold water through the feed tube. Stop once the dough begins to clump and looks shaggy—not fully combined.
- Pinch a bit of the mixture between your fingers. If it holds together, it’s ready. If it’s still dry or floury, pulse in a little more water, one tablespoon at a time.
- Transfer the crumbly dough to a lightly floured surface. Press it together gently and shape it into a ball. Divide into two equal portions and form each into a flat disc. Wrap the discs tightly in plastic wrap and refrigerate for at least 30 minutes or up to 2 days.
- To Freeze: Place wrapped dough discs in a freezer-safe bag and store for up to 3 months. Thaw overnight in the fridge before using.
- To Roll Out: If the dough has been chilling for a while, let it sit at room temperature for 10–20 minutes to soften slightly. Roll it out between two sheets of lightly floured parchment paper. If it cracks at the edges, just press the cracks back together—it’s normal with gluten-free dough.
Notes
- I usually go with Cup 4 Cup gluten-free flour for this recipe because it rolls out beautifully and tastes like classic pie crust. Bob’s Red Mill 1-to-1 Gluten-Free Baking Flour works too but it’s a lot more delicate and crumbly—great for galettes but tricky to move into a pie plate. If gluten isn’t an issue, any standard all-purpose flour works fine.
- For the best flavor and texture, use high-quality European-style butter brands like Kerrygold, Plugra, or Organic Valley.
- Be careful not to over-process the butter and flour in the food processor. Those visible bits of butter are what make the crust so flaky.
- Don’t worry if the dough looks rough and floury in the food processor—it will come together once you gather it by hand.
- If you don’t have a food processor, you can do this by hand in a big bowl. Whisk the dry ingredients together, then work in the cold butter with your fingers or a pastry cutter until you see those pea-sized pieces. Drizzle in the vinegar and cold water while tossing with a fork until it starts to clump. Then turn it onto parchment paper and finish shaping it just like in the recipe.
- This pie dough is perfect for making things like a strawberry galette, an apple galette with cinnamon and vanilla, a savory spinach galette, a Broccoli Cheddar Quiche, or even a gluten-free chicken pot pie.
Nutrition Information
Yield
9Serving Size
1Amount Per Serving Calories 244Total Fat 2gSaturated Fat 1gTrans Fat 0gUnsaturated Fat 1gCholesterol 3mgSodium 130mgCarbohydrates 49gFiber 2gSugar 2gProtein 6g
Leafyplated.com, occasionally offers nutritional information for recipes contained on this site. This information is provided as a courtesy and is an estimate only. This information comes from online calculators. Although Leafyplated.com attempts to provide accurate nutritional information, these figures are only estimates.

