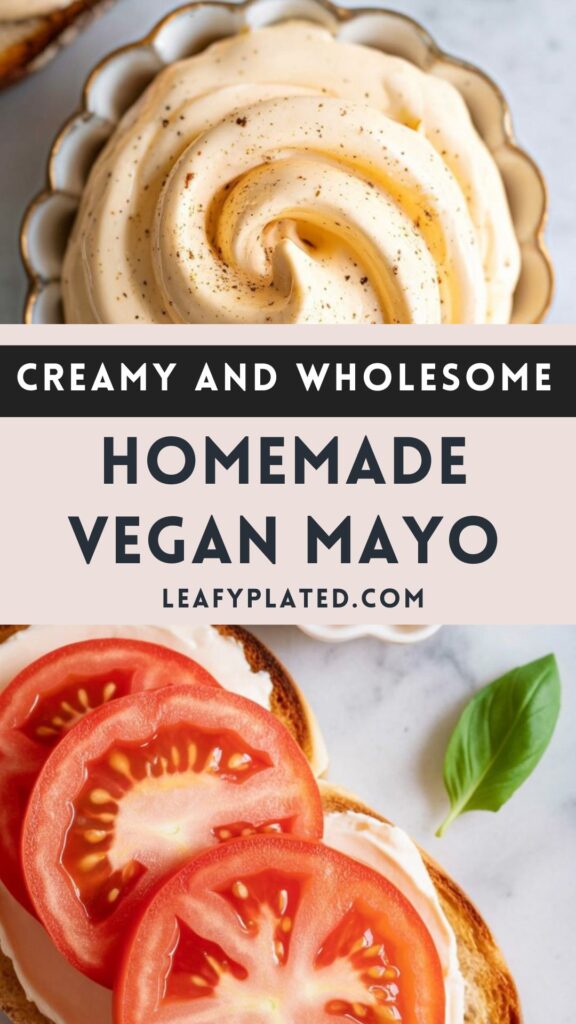
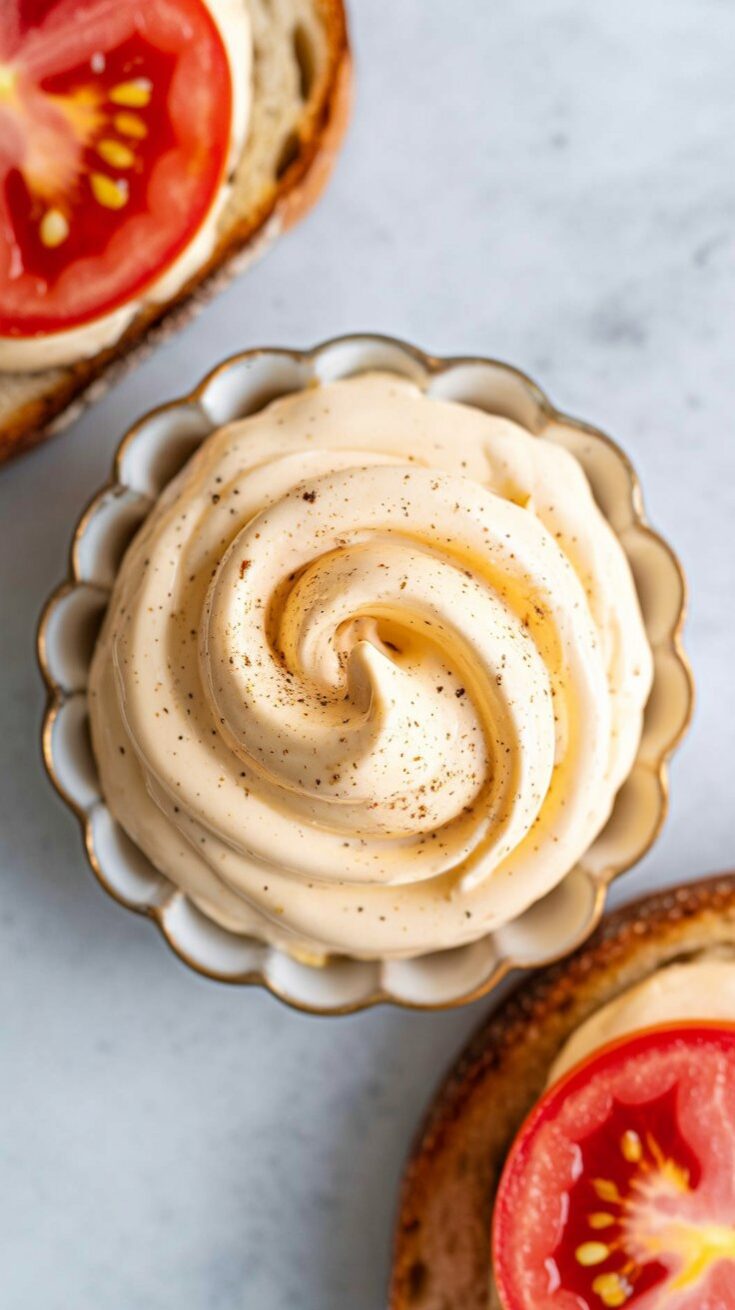
This thick, creamy vegan mayonnaise has been a staple in my fridge for years. It’s smooth, spreadable, and honestly tastes so close to the real thing that I’ve completely stopped buying store-bought mayo—vegan or not.
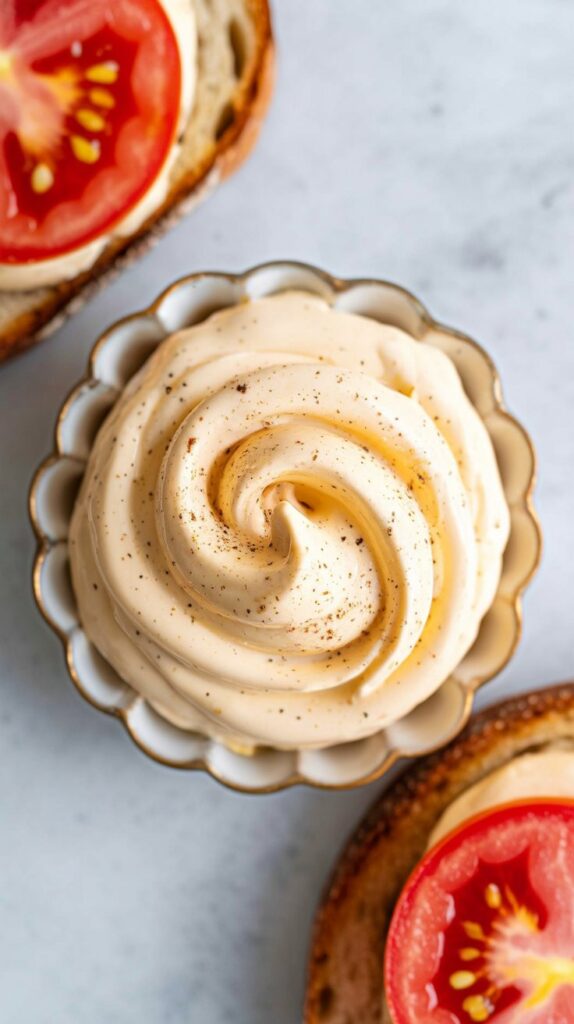
Whether you’re building a sandwich, tossing together a potato salad, or mixing up a quick dressing, this mayo works like a charm. And the best part? You only need a handful of pantry staples and a blender or food processor. No eggs, no dairy—just good, clean flavor.
Why I Always Make This From Scratch
Back when I first started cutting back on eggs, I thought mayo would be one of the harder things to replace. But after a few flops and messy batches, I figured out a method that works every time.
What surprised me the most was how fast it comes together. Once I got the hang of adding the oil slowly, it was smooth sailing. The result is a jar of silky mayo that I can tweak to my liking—sometimes a bit tangier, sometimes a little sweet depending on what I’m using it for. And honestly, once you make it yourself, it’s hard to go back.
Ingredients You’ll Need (And a Few Handy Notes)
Soy Milk or Aquafaba
These two are the stars here. Soy milk gives a rich, creamy texture, while aquafaba (that liquid from a can of chickpeas) is surprisingly magical when it comes to emulsifying. I usually use soy milk unless I’ve got an open can of chickpeas lying around—then it’s aquafaba all the way.
Neutral Oil: I stick with something mild like safflower or sunflower oil. Vegetable oil also works great. I’ve tried olive oil a few times, but unless it’s a light, fruity one, it tends to overpower the mayo. Save the bold olive oils for salad dressings instead.
Vinegar: Apple cider vinegar is my usual pick, but white wine or red wine vinegar do the job just fine. The acidity is what gives the mayo its kick.
Salt: Don’t be shy with the salt. Just a pinch more than you think really brings everything together. I learned this the hard way after a few too-bland batches.
Dijon Mustard: This adds tang and acts as a secret helper in the emulsification process. Even just a small amount goes a long way toward that classic mayo flavor.
Lemon Juice (Optional, but I Always Use It): Whenever I’ve got lemons on the counter, I squeeze in a little juice. It brightens up the flavor beautifully.
Sweetener (Optional): I usually skip this unless I’m making mayo for coleslaw or a dressing. When I do add sweetener, I use a small drizzle of maple syrup—it softens the sharp vinegar edge just enough.

How I Make It (And What I’ve Learned)
The first few times I tried making vegan mayo, I rushed the oil—and ended up with a soupy mess. Lesson learned: slow and steady wins the emulsification race.
Now I always make it in a food processor. Here’s how it goes:
- Add Everything Except the Oil
Pour in your soy milk or aquafaba, vinegar, mustard, salt, and lemon juice if using. - Start Blending, Then Drizzle the Oil
With the machine running, slowly drizzle in the oil. And I mean slowly. The first few tablespoons should go in drop by drop. Once you see it start to thicken, you can add a bit faster. - Blend Until Creamy
Keep it going until it’s thick and glossy—usually takes under 2 minutes total. If it’s not thickening, it probably needs more blending or you added the oil too fast. Just start again—it happens to the best of us.
Tools I Recommend (From My Kitchen to Yours)
Food Processor
This is my go-to. It’s reliable, powerful, and has a spout that makes streaming oil easy.
Immersion Blender
Great for small batches. I use a tall jar and blend from the bottom up. Toward the end, I lift the blender up and down to bring in a little air—it fluffs up nicely.
Regular Blender
Honestly, this one’s hit or miss for me. Sometimes it works, but it’s fussier than the other two. If it’s all you have, go slow and be patient.
By Hand (If You’re Brave)
Yes, you can make it with a whisk and strong arms, but I’ll be honest—I’ve only done it once and that was enough. Great if you’re out camping or your power’s out, though!
How I Use It in Real Life
I use this mayo almost daily. Some days it’s a spread on a veggie sandwich with tomato and cucumber. Other times, I stir it into chickpea salad or coleslaw. It’s also my secret base for quick sauces—just mix it with hot sauce for a spicy mayo, or add chopped pickles and lemon juice for a speedy tartar.
Here are a few things I often make with it:
- Potato Salad – The mayo makes it silky and coats the potatoes just right.
- Creamy Coleslaw – A little sweetener + this mayo = crowd-pleaser at BBQs.
- Smashed Chickpea Salad – Tastes like tuna salad but totally plant-based.
- Fry Sauce – Just mix it with ketchup and garlic powder. Dip anything in it.
- Vegan Ranch – Add dill, garlic, onion powder, and a splash of non-dairy milk.
How Long It Lasts (And How I Store It)
I store my vegan mayo in a clean glass jar with a tight-fitting lid. It keeps well in the fridge for about 2 weeks, though honestly, it never lasts that long in our house. Just give it a good stir before each use—it thickens even more as it chills.
One quick tip: don’t freeze it. The texture just doesn’t hold up.
Homemade Vegan Mayo
Thick, creamy, and absolutely plant-powered — this easy vegan mayonnaise is a total game changer for your sandwich spreads, salad dressings, and dips. It's just as luscious as traditional mayo but made entirely without eggs, and it comes together in minutes with just a handful of ingredients you likely already have in your pantry.
Ingredients
- 1 cup neutral oil (like safflower or vegetable oil)
- ½ cup unsweetened soy milk, room temperature
- 1½ teaspoons Dijon mustard
- 1 tablespoon white or red wine vinegar
- ¼ teaspoon fine sea salt (plus more to taste)
- 1 teaspoon lemon juice (optional, for brightness)
- A pinch of maple syrup or cane sugar (optional, for balance)
Instructions
- With a Food Processor: Start by pouring the soy milk into the bowl of your food processor. Let it run for about a minute until it begins to slightly thicken. Next, add in the vinegar, salt, mustard, and lemon juice if using. Give it another 30 seconds of blending to fully combine.
- Now comes the crucial part — slowly drizzle in the oil while the processor is running. Start with just a few drops at a time. Once the mixture starts to emulsify and thicken, you can increase the oil to a steady, thin stream. After all the oil is incorporated, scrape down the sides and bottom, then blend for a final 10 seconds.
- Taste and adjust with a little more salt or a touch of sweetener if you’d like. The mayo will thicken further after chilling in the fridge for a few hours. If it’s too thin even after chilling, blend in a bit more oil — very gradually — until you reach your desired consistency.
- With an Immersion Blender: In a tall, narrow container (like a mason jar), combine the soy milk, vinegar, salt, and mustard. Insert your immersion blender and blend on high until the mixture starts to emulsify.
- Keeping the blender running, slowly pour in the oil in a thin stream. This will take a minute or two. As the mayo thickens, gently move the blender up and down to add some air and create a fluffier texture.
- Once thick, taste and tweak seasoning if needed. Chill for a few hours to let it firm up further.
Notes
- Storage: Keep your homemade vegan mayo in an airtight container in the fridge for up to 2 weeks. A little liquid on top is normal — just give it a stir before using.
- Substitute: No soy milk? Try aquafaba (the liquid from a can of chickpeas). Use ¼ cup instead of soy milk. Since aquafaba is thinner, you might notice a bit less body, but it still whips up beautifully.
- Consistency too runny? Blend in more oil, a few drops at a time, until it firms up.
Nutrition Information
Yield
1Serving Size
1Amount Per Serving Calories 2022Total Fat 225gSaturated Fat 15gTrans Fat 2gUnsaturated Fat 200gCholesterol 0mgSodium 738mgCarbohydrates 6gFiber 1gSugar 5gProtein 2g
Leafyplated.com, occasionally offers nutritional information for recipes contained on this site. This information is provided as a courtesy and is an estimate only. This information comes from online calculators. Although Leafyplated.com attempts to provide accurate nutritional information, these figures are only estimates.
Final Notes from My Kitchen
This easy vegan mayonnaise is one of those recipes that once you try, you’ll wonder why you ever bought it in the first place. It’s simple, reliable, and completely customizable to your taste. I always keep a jar in my fridge—it’s become a kitchen essential around here.
If you’ve never made homemade mayo before, this is a great place to start. And if you already love it, this version is a great way to skip the eggs without skipping any flavor.
Try Other Vegan Recipes:
")